
|
This week's assignment was to photograph people and things I'm thankful for. This year, we didn't have thanksgiving this weekend because of my Grandpa being ill, but I made the best out of it. The first thing I'm thankful for is my dog; Bella. This photo was taken from a lower angle and is centre weighted. First, I lens corrected, and applied the dropper to a neutral colour. I then cropped the top of the photo a bit to give it a better balance. Then, I increased the temperature to +11 to make the picture warmer and bring out the yellow tones in my dog's fur. I also increased the tint to +10 to give the walls a more magenta hue. I increased the contrast by +14 to showcase every detail of Bella's fur and facial features such as her eyes. I decreased the highlights to -44 because the white in Bella's fur was blinding due to the lighting and increased the shadows to +7 to increase the depth in her face. Lastly, I turned up the vibrance by +6 and saturation to +2 to have the neutral colours on Bella pop.
|
|
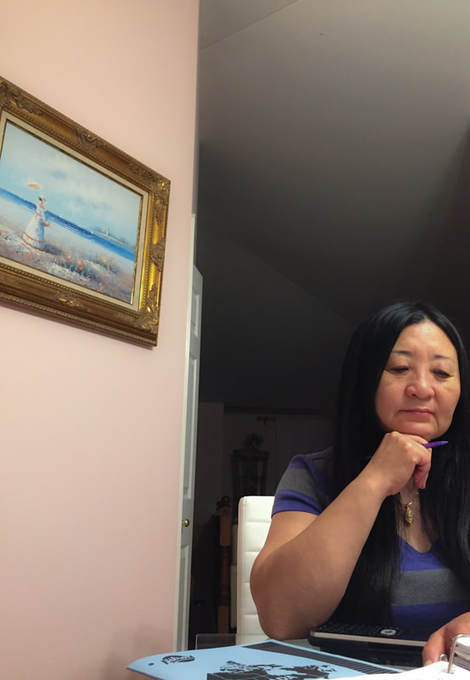
The second thing I'm thankful for are my parents and family. My mom is pictured here helping me with homework. First I lens corrected, and enhanced the photo with the white balance dropper. The original photo had an odd view of a wall on the right side, therefore I cropped it out. The lighting was very warm at first, with a yellow tint so I decreased the temperature to -7. I then tinted the photo to +8 to bring out the pink in the walls. I then adjusted the exposure to -0.45, while also decreasing the highlights to -2 to tone down the bright indoor lighting. I adjusted the whites to +12 to help the white chair pop and decreased blacks to help my mom's hair appear it's true shine and colour. The original photo was a bit grainy, so I smoothed it out by decreasing the clarity to -37 while still keeping it's quality. I then increased the vibrance and saturation to give the picture an overall bright feeling.
|

|
The third thing I'm thankful for are my friends. Here's my friend Ju playing the piano while a bright light is reflecting her face onto the shiny surface of the piano. First, I lens corrected and white balanced the photo using the dropper and a neutral grey colour. Then I cropped the top of the photo because in the original, the blinding light from the lamp was seen. Next, I turned down the temperature to -19 to bring out the blue hues from the painted walls. I increased the tint to +18 to balance out the cool tones from the temperature. Then i adjusted the highlights to -2 to decreased the light from the lamp. I increased the whites to +12 to bring out the piano keys, and the blacks to -8 to enhance the black of the piano and piano keys. I then increased the clarity to +9 to create sharper lines from what the bright light gave off. Lastly, I increased the vibrance to +25 to bring out the yellow of Ju's sweater and red of the piano cloth. Overall it gave the photo a pop of colour and contrast compared to the black and whites of the piano.
|
